
The following outlines the functionality a supplier will have on the VPO List. For VPO users, please see, Using the VPO List (VPO Users).
Using the Filter on the VPO screen:
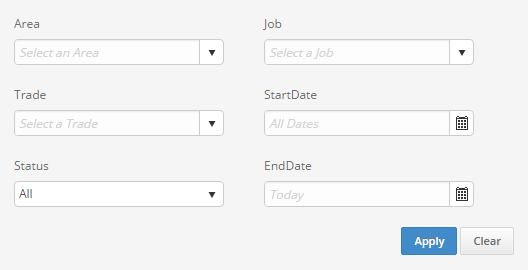
The filter button  is found in the upper right
corner of the VPO List. Once a user selects this, the following options
become available. A user can select one or multiple filter options to
narrow down -the VPOs to be displayed on the VPO List. Click Apply to
apply the filter, or select Clear to clear all filters.
is found in the upper right
corner of the VPO List. Once a user selects this, the following options
become available. A user can select one or multiple filter options to
narrow down -the VPOs to be displayed on the VPO List. Click Apply to
apply the filter, or select Clear to clear all filters.
Area – The area will only display VPOs associated to jobs within the area selected. In addition, the Area selection is required if the user wishes to filter by Job.
Job – The job will only display VPOs associated to the job selected.
Trade – The trade will only display VPOs with the trade selected.
Start Date and End Date
– These allow a date range to be selected to only display VPOs created
within the range.
Examples:
If, no end date is specified, and a start date of Oct. 12, 2015 is
selected, then the VPO List will be filtered to only show VPOs created
on or after Oct 12, 2015.
If, no start date is specified, and an end date of Oct. 12, 2015 is
selected, then the VPO List will be filtered to only show VPOs created
on or before Oct 12, 2015.
Status – The following status are available. When a status is selected the VPO List will only display VPOs currently at the status selected, or if “All” is selected then VPOs of all statuses will be displayed.
o All
o Pending Supplier Response
o Pending Admin Approval
o Pending Payment Approval
o Canceled
o Closed
 Export:
Clicking this button will create a csv file of the VPO list displayed
on the VPO screen.
Export:
Clicking this button will create a csv file of the VPO list displayed
on the VPO screen.
 Print:
Clicking this button will produce a printable version of the VPO list
from the VPO screen.
Print:
Clicking this button will produce a printable version of the VPO list
from the VPO screen.